Ready to keep your aloe vera plant thriving? Repotting it might seem hard, but it’s rewarding. This guide will show you how to repot an aloe vera plant step by step. You’ll learn how to revitalize your plant and help it grow well.
Aloe vera plants are loved for their healing properties and beauty. They need proper aloe vera repotting to stay healthy. This guide will teach you how to care for your aloe vera plant, whether you’re new or experienced.
Key Takeaways
- Aloe vera plants should be repotted when they outgrow their current pot or when the main plant is ready for propagation.
- Propagating aloe vera plants by splitting aloe pups during repotting allows for the growth of more plants.
- Recommendations for repotting include using a well-draining potting mix and placing the plant in indirect sunlight.
- Choosing the right pot size and material, such as terracotta or ceramic, is crucial for optimal aloe vera plant health.
- Proper watering techniques and post-repotting care are essential for a successful aloe vera repotting experience.
Understanding Aloe Vera Plants and Their Growth Habits
Aloe vera plants have thick, water-storing leaves. They are tough and can live in many places. They like well-draining soil and indirect sunlight, just like their natural home. Knowing how to care for them is key to their health and growth.
For more information, check out aloe vera plant care tips.
Characteristics of Healthy Aloe Plants
Healthy aloe vera plants have firm, upright leaves. They also grow new plants, called “pups.” These pups help the plant spread and look full.
The leaves should be a bright green. If they turn yellow or brown, it’s a sign of trouble.
Growth Patterns and Development Stages
Aloe vera plants grow new leaves and pups as they get older. They can grow up to 30-40 centimeters tall. As they mature, their leaves get bigger and more noticeable.
It’s important to care for them well at each stage of growth. This keeps them healthy and looking good.
Natural Habitat Requirements
Aloe vera plants come from hot desert areas. They need lots of sunlight to grow well. They are also great at cleaning the air in your home.
Under the right conditions, they even produce small, bell-shaped flowers. This adds to their beauty.
“Aloe vera juice is noted for its detoxifying properties, while the gel from the leaves is commonly used to treat sunburns, acne, cuts, scrapes, and stings due to its healing properties.”
Signs Your Aloe Vera Needs Repotting
If your aloe vera plant shows certain signs, it might be time to repot. Knowing when to repot helps your aloe vera stay healthy and vibrant. Let’s look at the key signs that your aloe vera needs a new pot.
One clear sign is if the plant has outgrown its pot. When roots show through the drainage holes or the plant leans, it needs more space. Stunted leaf growth or wilting leaves also mean it’s time for a bigger pot.
Another sign is if the soil is too compact. This makes it hard for the plant to absorb water properly. Repotting into fresh, well-draining soil can fix these issues and keep your plant healthy.
Aloe vera plants usually need repotting every 2-3 years. Watching your plant’s growth helps you know when to repot. This ensures your aloe vera gets the space and resources it needs to thrive.

Repotting your aloe vera at the right time is crucial for its health. Paying attention to signs of needing a new home keeps your plant thriving. This way, it will continue to offer its benefits and beautiful foliage for years.
Best Time to Repot Your Aloe Plant
Timing is key when repotting your aloe vera. The best time is during the growing season, which is spring and summer. Early fall is also good in temperate climates.
Seasonal Considerations
Repotting your aloe in its growing season helps it thrive. This is when it can quickly grow roots in new soil. Don’t repot in winter, as the plant is dormant and may struggle.
Plant Maturity Factors
Aloe vera plants can handle being a bit rootbound. Repot only if you see signs of stress like stunted growth or wilting leaves. Repot when it’s outgrown its pot or ready for new offsets.
Growth Cycle Timing
The best time to repot is when your aloe is actively growing, usually in spring or early summer. This lets it quickly settle into new soil. Avoid winter repotting, as it’s dormant and may not adjust well.
“Aloe vera plants should be repotted when they outgrow their current pot or when the main plant is ready for propagation.”
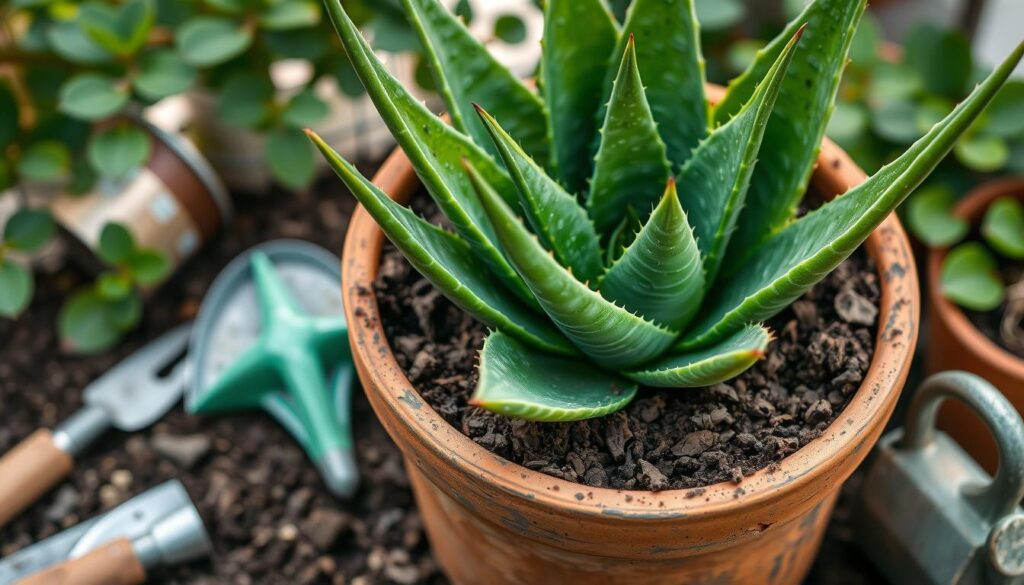
Essential Tools and Materials for Repotting
Repotting aloe vera plants is key to keeping them healthy and growing well. To do it right, you need the right tools and materials. Aloe vera repotting needs garden gloves, a sharp knife, a hand trowel, clean pots, and aloe vera potting materials. You also need a workspace to make the job easier.
Garden gloves protect your hands from aloe vera’s spiny leaves. You’ll need a sharp knife or scissors to separate the offsets (pups) from the main plant. A hand trowel helps you gently move the plant to its new home.
- Garden gloves
- Sharp knife or scissors
- Hand trowel
- Clean pots with drainage holes
- Aloe vera potting materials (well-draining soil, sand, or perlite)
After getting your tools, set up a clean, flat area to work on. A repotting mat or newspaper can help keep things tidy. With the right aloe vera repotting tools and a clean space, you’re ready to repot your aloe vera plant.

“Repotting aloe vera plants is a crucial step in maintaining their health and promoting vibrant growth.”
| Essential Aloe Vera Repotting Tools | Aloe Vera Potting Materials |
|---|---|
| Garden gloves | Well-draining soil |
| Sharp knife or scissors | Sand or perlite |
| Hand trowel | Clean pots with drainage holes |
Choosing the Right Pot Size and Type
Choosing the right pot size and material is key for your aloe vera plant’s health. Aloe vera plants do best in small, shallow pots. These pots should fit their unique root system and water needs well.
Material Considerations
The best pot material for aloe vera is terracotta or ceramic. These materials let air and moisture reach the roots better. Terracotta pots are great at preventing waterlogging and keeping aloe vera’s preferred dry conditions.
Plastic pots are light and cheap but hold moisture more. This can cause overwatering if not watched closely. Ceramic pots are stylish but can be heavy and need extra care for drainage.
Drainage Requirements
- Make sure the new pot has enough holes for water to drain. This prevents waterlogging and root rot.
- Choose a pot that’s 5-10% wider than your aloe vera plant. This gives room for growth without crowding the roots.
- For big outdoor aloe vera plants, pick a large pot with a wide base. This keeps the plant stable and fits its size.
By picking the right material and drainage, you give your aloe vera the best growing conditions. Repot your aloe vera every 4-5 years to keep it healthy and encourage new growth.
How Do You Repot an Aloe Vera Plant
Repotting an aloe vera plant is key to keeping it healthy and growing. It’s needed when the plant gets too big or when you want to give it fresh soil and a bigger pot. Here’s a simple guide on repotting aloe vera step-by-step and aloe vera potting instructions.
- Water the aloe vera plant 3-5 days before repotting. This makes the plant less stressed and more ready for the change.
- Gently take the plant out of its pot. If the roots are stuck, use a knife or trowel to loosen the soil and gently separate the root ball.
- Look at the roots and cut any damaged or dead ones with sterile pruning shears. This helps new growth and stops rot.
- Choose a new pot that’s 2-3 inches wider than the old one. Make sure it has holes for drainage to avoid waterlogging.
- Put a layer of well-draining succulent soil mix at the bottom of the new pot. Place the aloe vera plant in the center, making sure the top of the root ball is a bit above the pot’s rim.
- Fill the sides of the pot with more soil mix, gently pressing it down to get rid of air pockets. You can also add a bit of compost to make the soil better.
- Water the repotted aloe vera plant, but don’t overdo it. Let the soil dry a bit before watering again.
With these steps, your aloe vera plant will thrive in its new home. Make sure it gets the right light, water, and nutrients to stay healthy and look great.

| Aloe Vera Plant Characteristics | Ideal Conditions |
|---|---|
| Size | 30-40cm long, 6-7cm wide at base |
| Flowers | Yellow, red, or orange, 60-90cm tall |
| Temperature Tolerance | 20-25°C, not frost-hardy |
| Soil Requirements | Mineral and nutrient-rich, highly permeable |
| Repotting Frequency | Every 2-5 years |
“Aloe vera can be kept in the same pot for years, but I suggest repotting it every year or every six months to keep it healthy and thriving.”
By following these steps, you can keep your aloe vera plant vibrant and strong for many years.
Creating the Perfect Soil Mix
Getting the right soil mix is key for your aloe vera plant’s health. Aloe vera needs a soil that drains well and is rich in nutrients. This prevents root rot and helps the plant grow strong.
Don’t use regular potting soil. It holds too much water, which is bad for these plants that love dry air.
Soil Components
To make the best aloe vera potting mix, mix equal parts of these:
- Potting soil – Gives your aloe vera plant the nutrients it needs.
- Sand – Helps with drainage and air, like the desert home of aloe vera.
- Perlite or pumice – These light materials help with drainage and air around the roots.
You can also buy a succulent soil for aloe vera mix. It’s made to keep the right balance of moisture and drainage.
Drainage Properties
| Soil Component | Function |
|---|---|
| Sand | Improves drainage and aeration |
| Perlite | Expands to create air pockets, enhancing drainage |
| Pumice | Lightweight volcanic rock that retains some moisture while facilitating drainage |
With these ingredients, you’ll make a aloe vera potting mix that drains well. It will meet your aloe vera plant’s needs, keeping it healthy and vibrant.
Separating and Propagating Aloe Pups
Aloe vera plants grow offsets, or pups, naturally. These can be separated and grown into new plants. This makes it easy to expand your aloe collection. Dividing and replanting pups is simple and quick, perfect for the succulent world.
Look for small pups around the base of a mature aloe plant. Gently remove them, making sure each has roots. Let the cut surfaces dry for a day or two before planting them in small pots with draining soil.
- Identify the pups (offshoots) around the mature aloe plant.
- Carefully separate the pups, ensuring each has some roots attached.
- Let the cut surfaces of the pups callus over for 24 hours before planting.
- Plant the pups in small pots with a succulent-specific soil mix.
- Water the newly planted pups sparingly until they become established.
Propagating aloe pups is a great way to grow more plants. Late winter and early spring are the best times for this, with less damage to the roots. This method is popular in the succulent world for spreading aloe vera plants efficiently.
| Aloe Vera Propagation Details | Value |
|---|---|
| Number of Aloe Vera pups to expect on a mature plant | Varies |
| Ideal size for Aloe Vera pups before propagation | 4-6″ tall |
| Success rate of propagating Aloe Vera in soil mix over water | 100% |

“Aloe plants produce offsets, or pups, as part of their growth cycle, allowing for easy propagation which can lead to an increased number of aloe plants.”
Proper Watering Techniques After Repotting
Caring for your aloe vera plant after repotting is a delicate task. Wait 5 to 7 days before watering. This lets any root damage heal and the plant adjust to its new home. When you do water, be careful not to overdo it. Just moisten the soil and let it dry out between waterings.
Initial Watering Schedule
In the summer, water your aloe vera every 10 to 14 days. In the winter, you can wait 14 to 21 days between waterings. Adjust this based on your climate and the pot size. The key is to avoid overwatering, which can cause root rot and other problems.
Long-term Water Requirements
After your aloe vera settles into its new pot, you can stick to a regular watering schedule. Check the soil often. Water only when the top 1 to 2 inches are dry. This keeps your aloe vera plant happy and healthy.
Remember, the right amount of water is key for your aloe vera’s health after repotting. By watering correctly and letting the soil dry out, you meet your aloe vera’s water needs. This helps it settle into its new home.
| Season | Watering Frequency |
|---|---|
| Summer | Every 10-14 days |
| Winter | Every 14-21 days |
Post-Repotting Care and Recovery
Caring for your aloe vera plant after repotting is key to a smooth transition. It helps your plant stay healthy. After repotting, give your aloe the right environment and care to thrive.
First, put the repotted aloe in its original spot. It should get bright, indirect sunlight. Don’t expose it to direct sunlight for a few weeks to avoid stress and sunburn. Watch for signs of transplant shock like wilting or stopped growth.
Don’t fertilize your aloe vera for at least a month after repotting. It needs time to settle its roots in the new mix. If moving it outdoors, slowly get it used to direct sunlight.
Keep watering consistent, adjusting as needed. Aloe vera likes well-draining soil to avoid root rot. Check moisture by sticking your finger in the soil. Water when the top 1-2 inches are dry.
With patience and proper care, your aloe vera will bounce back and grow well. Follow these tips for a successful transition and enjoy your aloe vera’s beauty and benefits.

“Proper post-repotting care is the key to a healthy, thriving aloe vera plant.”
Common Repotting Mistakes to Avoid
Repotting an aloe vera plant needs careful attention. This ensures the plant stays healthy and grows well. Here are some common mistakes to avoid:
- Using too large a pot – Choose a pot only a bit bigger than the current one. This prevents overwatering and stunted growth.
- Overwatering after repotting – Wait until the soil is partially dry before watering the aloe vera again.
- Using regular potting soil – Aloe vera does best in a well-draining cactus or succulent-specific soil mix.
- Repotting during dormant seasons – Spring or early summer is the best time to repot. This is when the plant is actively growing.
- Damaging roots during the process – Handle the plant gently and avoid excessive disturbance to the root system.
Another mistake is exposing a freshly repotted aloe vera to direct sunlight right away. This can stress the plant and cause it to wilt. Instead, gradually introduce the aloe to brighter light over a few weeks.
| Types of Criteria for Repotting Aloe Vera | Considerations |
|---|---|
| Roots coming out the bottom of the current pot | Indicates the plant has outgrown its container and needs a larger pot |
| Soil drying out very quickly | Suggests the pot is too small or the soil mix is not retaining moisture properly |
| Water running straight through the current soil/pot | Indicates the need for a more well-draining soil mix |
| Lack of new growth | May signify the plant is becoming root-bound and needs repotting |
| Overall plant looking dull and lackluster | Can be a sign the aloe vera is stressed and in need of repotting |
| Presence of root rot symptoms | Requires immediate action to prevent further damage to the plant |
By avoiding these common aloe vera repotting errors and following best practices, you can ensure your aloe vera plant thrives. It will continue to add beauty to your indoor or outdoor space.
Troubleshooting Repotting Problems
Repotting an aloe vera plant can sometimes present a few challenges, but with the right approach, these issues can be easily addressed. Let’s explore some common problems that may arise during the repotting process and discuss how to solve them.
Root Issues
One of the primary concerns when repotting aloe vera plants is the potential for root rot. If you notice mushy, discolored stems or yellowing leaves, it could be a sign of root rot. In such cases, it’s essential to act quickly. Carefully remove the plant from the pot and inspect the roots. Trim away any affected or damaged roots using clean, sharp pruners. Then, replant the aloe vera in fresh, well-draining soil to prevent further issues.
Transplant Shock Solutions
Aloe vera plants can experience transplant shock after being repotted, which can manifest as wilting, drooping leaves, or even a temporary halt in growth. To help your aloe vera recover from transplant shock, provide consistent care, avoid overwatering, and protect it from extreme temperatures. If the leaves start to droop, you can temporarily support them with small, decorative stakes or props until the plant regains its strength.
By understanding and addressing these common repotting problems, you can ensure a smooth transition for your aloe vera plant and help it thrive in its new home. With a little care and attention, you can overcome any aloe vera repotting issues and solve aloe vera transplant problems that may arise during the repotting process.

“The key to a healthy aloe vera plant is proper repotting and care. By addressing any root issues or transplant shock, you can ensure your aloe thrives in its new environment.”
Conclusion
Repotting your aloe vera plant is easy and can make it grow better. Knowing what your succulent needs helps you transplant it well. This way, you can enjoy its benefits for many years.
This aloe vera repotting guide has given you all the key info. You now know how to pick the best pot and soil. Also, you know how to water and care for it right.
By following these steps, your successful aloe vera transplanting will make your plant flourish. It might even grow offsets to share with others. Enjoy growing this easy-to-care-for succulent and let it inspire your gardening.