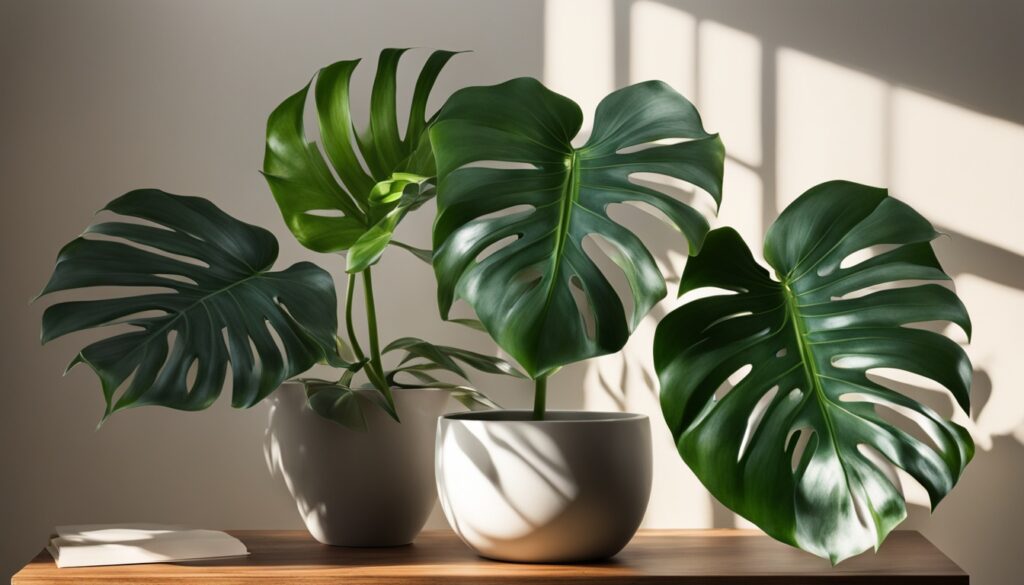
Are you ready to make your spider plant thrive again? These beautiful plants need a little care when they grow too big. This guide will show you how to repot your spider plant, so it stays healthy and beautiful for years.
Key Takeaways
- Repotting spider plants is essential for maintaining their health and promoting growth
- The ideal time to repot is during the active growth period in spring and summer
- Choosing the right potting mix and container size is crucial for successful transplanting
- Handling the delicate root system with care is vital to prevent damage
- Proper post-repotting care, including watering and fertilizing, ensures a smooth transition
So, are you ready to take your spider plant’s health to new heights? Let’s dive in and uncover the secrets to successful replanting.
Understanding Spider Plants and Their Growth Patterns
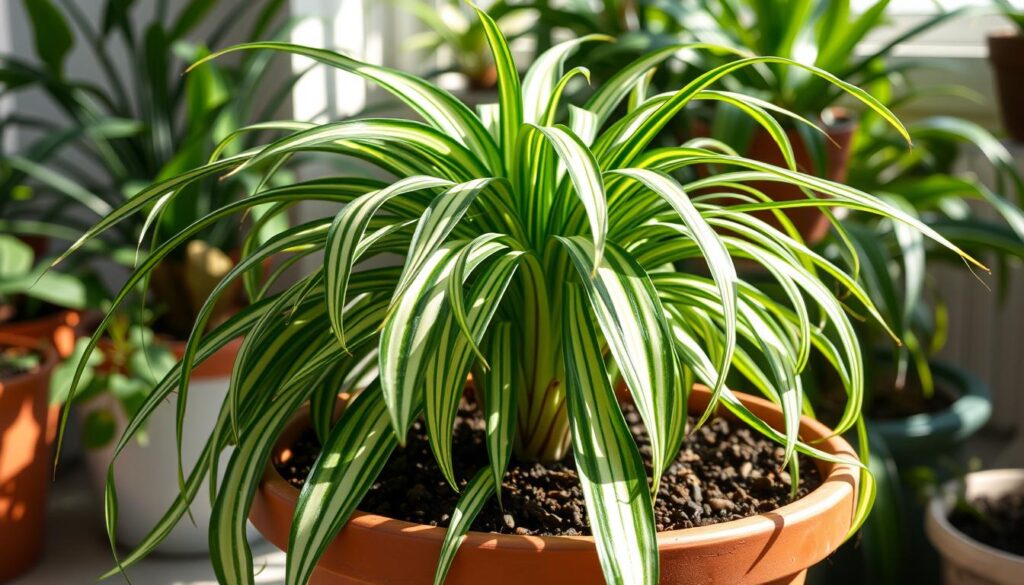
Spider plants, also known as Chlorophytum comosum, are very common and loved by many. They are not just pretty but also clean the air by removing harmful chemicals.
Basic Characteristics of Chlorophytum Comosum
These plants can grow up to 12-15 inches tall. They produce small white flowers that look like stars. The plantlets that grow after these flowers can be easily planted in new pots.
Natural Growth Cycle and Development
Spider plants can do well even if you forget to care for them. They come from South Africa’s coastal areas and can grow outdoors in warm places. The growth cycle of spider plants makes them great for indoor gardens.
Signs of a Healthy Spider Plant
A healthy spider plant has bright green or variegated leaves. It also produces many offspring, or spiderettes. These can be easily grown into new plants, making spider plants a great choice for indoor gardening.
| Statistic | Value |
|---|---|
| Spider plants are one of the most common and well-known houseplants. | – |
| Spider plants are effective in cleaning indoor air by absorbing chemicals like formaldehyde, xylene, benzene, and carbon monoxide. | – |
| Spider plants can grow 12-15 inches tall. | – |
| Spider plants produce small white, star-shaped flowers. | – |
| Spider plants propagate easily by planting the plantlets that succeed the flowers in their own pots. | – |
| Spider plants are tolerant of neglect and can thrive in nearly any type of condition. | – |
| Spider plants can be grown as ground cover outdoors in warmer climates. | – |
| Spider plants are native to coastal areas of South Africa. | – |
“Spider plants can be one of the most rewarding and easy-to-care-for indoor plants, making them a top choice for both novice and experienced gardeners.”
When Is the Right Time to Replant Spider Plant
Timing is key when repotting your spider plant (Chlorophytum comosum). Spring or summer is the best time. This is when your plant grows the most and adapts well to new soil.
Watch for these signs that your spider plant needs a new home:
- Roots growing through the drainage holes of the current pot
- Roots appearing above the soil line
- Stunted growth or diminished vigor of the plant
- Soil degradation after a few years of growth
By observing your spider plant’s growth, you can tell when it’s time to move it. A bigger pot means more room for growth and more baby plants.
“Spider plants are widely available in garden centers, supermarkets, and florists’ shops, with a choice of cultivars that may be limited.”
Repotting every 2-3 years keeps your spider plant healthy. Paying attention to its needs ensures it stays vibrant and productive.

Essential Tools and Materials for Repotting
Repotting your spider plant is easy, but you need the right tools and materials. This ensures a successful transplant. Let’s look at what you need for this task.
Container Selection Guide
Choose a new container that’s 1-2 inches wider than your current one. This extra space helps your plant’s roots grow well. Make sure the pot has drainage holes to avoid waterlogging and root rot.
Soil and Amendment Requirements
The best potting mix for spider plants is well-draining and made for houseplants. A mix of two parts potting mix, one part perlite, and one part coconut coir or compost is great. This mix meets your spider plant’s soil needs, giving it the nutrients and air it needs to grow well.
Necessary Tools
- Pruning shears or scissors
- Gardening gloves
- Watering can
- Trowel or scoop
With these tools and materials, you’re ready to repot your spider plant. You’ll give it the best environment for growth and development.
“Spider plants are one of the toughest and most resilient houseplants, making them an excellent choice for both novice and experienced plant enthusiasts.”
| Item | Quantity | Purpose |
|---|---|---|
| Potting Mix | 2 parts | Provides nutrients and structure for the plant’s roots |
| Perlite | 1 part | Improves soil drainage and aeration |
| Coconut Coir or Compost | 1 part | Enhances water retention and nutrient content |
Signs Your Spider Plant Needs Repotting
As an indoor plant lover, you know how important indoor plant maintenance is. One sign it’s time to repot your spider plant is when roots grow out of the drainage holes. This means the plant needs more room to grow.
Another sign is if your plant’s growth slows down or leaves turn yellow. This could mean the roots are too tight. It’s hard for the plant to get water and nutrients then. Watch for these signs to know when to repot your spider plant.
“Repotting spider plants is recommended if they are living in aged, stagnant soil.”
It’s important to repot at the right time. Spring and summer are best because the plant is actively growing. Repotting in winter can stress the plant too much.

Keep an eye out for signs your spider plant needs repotting. This way, your plant can keep growing strong. A little care goes a long way in keeping your indoor space beautiful.
Preparing Your Spider Plant for Transplanting
Before you repot your spider plant, check its root health. This step-by-step guide will help your plant thrive. It ensures a smooth repotting process for your Chlorophytum comosum.
Pre-Repotting Care Instructions
To get your spider plant ready for transplanting, follow these steps:
- Gently remove the plant from its current pot, being careful not to damage the roots.
- Carefully loosen the soil around the root system, allowing you to see the overall condition of the roots.
- Examine the roots for any signs of damage, such as discoloration, brittleness, or excessive tangling.
- Prune any excessively long or damaged roots using clean, sharp scissors or pruners.
- Avoid letting the roots dry out during this process by keeping them moist and covered.
Root System Assessment
Inspecting your spider plant’s root system is key before transplanting. Look for these signs:
- Healthy, white and fleshy roots that indicate a thriving plant
- Minimal tangling or overcrowding of the roots, which can signal it’s time for a larger pot
- Discolored, mushy, or damaged roots that may require pruning or indicate underlying issues
By carefully assessing the root system, you can determine if your spider plant is ready for repotting or if it needs additional attention before the process.
Choosing the Perfect Potting Mix
Choosing the right potting mix is key for your spider plant’s health. Spider plants do well in soil that drains well and holds some moisture. The best pH for them is between 6-7, helping them absorb nutrients and grow roots.
To make the perfect mix, mix high-quality compost, coconut fibers, and a bit of clay or loamy soil. This mix keeps the soil moist but not too wet. It’s perfect for your spider plant to grow well.
- Spider plants have been kept as houseplants for over 200 years.
- Spider plant was introduced to Europe in the late 18th Century by Carl Peter Thunburg.
- Spider plant was included in NASA’s Clean Air Study in 1989.
Don’t use regular garden soil, as it can get too dense. Instead, choose a mix that’s light and lets roots grow well. This mix should also help your plant absorb nutrients.
“A well-draining potting mix is essential for the success of your spider plant. It should hold moisture without becoming waterlogged, providing the perfect balance for its roots to flourish.”
By picking the right potting mix, you’ll help your spider plant stay healthy and vibrant. Choose a mix that’s rich in nutrients and meets your plant’s needs.

Selecting the Right Container Size and Type
Choosing the right pot is key when repotting your spider plant. Pick one that’s 2-3 inches bigger than the old one. This gives the roots room to grow without getting too cramped.
Drainage Requirements
Spider plants need good drainage to avoid root rot. Make sure the new pot has holes at the bottom. This lets water out and keeps the soil just right for your plant.
Material Considerations
The pot’s material matters too. Clay or terracotta pots are great for spider plants. They let air in and help control moisture. This keeps the roots healthy.
Plastic or glazed ceramic pots work too, but they need more care. They might hold too much water or make the soil too dense.
Find a pot that fits your plant and meets its needs. The right pot ensures your spider plant stays happy and healthy for a long time.
“Spider plants are considered one of the easiest houseplants to care for, making them a popular choice among plant enthusiasts.”
Step-by-Step Repotting Process
Repotting your spider plant is key to keeping it healthy and helping it grow. Follow these easy steps for a successful repotting:
- Prepare the new pot by filling it halfway with a high-quality, well-draining spider plant care potting mix.
- Gently remove the spider plant from its old container, taking care not to damage the root system.
- Inspect the roots and, if necessary, use a clean, sharp tool to trim any damaged or excessively long roots.
- Place the plant in the new pot, ensuring the root crown is at the same level as it was in the previous container.
- Carefully fill the gaps around the plant with more of the potting mix, gently pressing to remove any air pockets.
- Water the plant thoroughly to settle the soil and encourage new root growth.

Remember, the key to successful replant spider plant repotting is choosing the right-sized container and using a well-draining soil mix. With the right care and attention, your spider plant will thrive in its new home.
Post-Repotting Care Guidelines
After repotting your spider plant, it needs the right care to grow well. Follow some easy steps to help your plant adjust and grow strong. This will make sure your indoor plant stays healthy.
First, put the spider plant in a spot with bright, indirect light. It likes light but too much sun can harm it. This can cause leaves to turn yellow or wilt.
It’s also important to keep the air around the plant humid, about 70% or more. You can do this by misting the leaves often or using a pebble tray. Also, keep the temperature around 20°C (68°F). Spider plants do best in mild, steady temperatures.
- Water the plant often, but don’t overdo it. Too much water can cause root rot.
- Feed your spider plant with fertilizer every 2-4 weeks in spring and summer. Use a balanced, water-soluble fertilizer.
- Watch for any signs of stress like wilting, color changes, or pests. Deal with these problems quickly.
| Care Aspect | Recommendation |
|---|---|
| Lighting | Bright, indirect light |
| Humidity | 70% or higher |
| Temperature | Around 20°C (68°F) |
| Watering | Regular, but avoid overwatering |
| Fertilizing | Every 2-4 weeks during growing season |
By following these spider plant care tips, your repotted plant will adjust well. It will continue to thrive as part of your indoor plant maintenance routine.
“Spider plants have been kept as houseplants for over 200 years, with their popularity steadily increasing as a choice for plant keepers.”
Common Mistakes to Avoid When Repotting
When repotting houseplants like spider plants, watch out for common mistakes. These can harm your plants. By avoiding these errors, your spider plants will stay healthy and grow well.
Watering Errors
One big mistake is overwatering after repotting. Spider plants can get root rot from too much water. Make sure the soil dries a bit between waterings to avoid this.
Sizing Mistakes
Choosing the right pot size is key. Don’t pick a pot that’s too big. A pot that’s too large can cause water to stay too long, hurting the plant’s growth. Instead, choose a pot just a bit bigger than the old one. This helps the roots grow well and prevents too much water.
Also, be careful with the roots when repotting. Rough handling can hurt the roots, stressing the plant. With some care, you can make sure your spider plant does well.

“Proper repotting techniques are crucial for the long-term health and vigor of your spider plants.”
By avoiding these mistakes and following good practices for repotting houseplants and spider plant care, your plants will flourish. They’ll keep your space looking green and lively.
Dividing Spider Plants During Repotting
Dividing spider plants during repotting is a great way to keep them healthy. Spider plants grow “spider babies” or offsets. These can be separated and planted to create new plants.
The best time to divide a spider plant is in the spring or summer. This is when the plant is growing the most. Dividing helps the new plants grow well and prevents overcrowding.
- Look for sections of the plant with several leaves and well-established root systems. These sections are the best candidates for division.
- Gently remove the plant from its current pot and inspect the root system. Identify natural division points where the plant can be separated.
- Use a sharp, clean knife or scissors to carefully divide the plant, ensuring each division has a portion of the roots attached.
- Prepare new containers with well-draining potting mix, ensuring the containers are at least 3-4 inches wide to accommodate the divided plants.
- Plant the divided sections in the new containers, taking care to position them at the same depth as they were previously growing.
- Water the divided plants thoroughly and place them in a bright, indirect light location to encourage new growth.
- Avoid fertilizing the divided plants for at least a month to allow them to recover and establish their root systems.
Dividing spider plant babies during repotting helps you grow new plants. It also keeps the mother plant healthy. This method lets you share these easy-to-care-for plants with others.
| Spider Plant Propagation Techniques | Advantages | Considerations |
|---|---|---|
| Dividing Spider Plant Babies |
|
|
| Water Propagation |
|
|
| Soil Propagation |
|
|
Dividing spider plant babies is a simple and effective way to propagate new plants. It keeps your existing spider plants healthy and strong.
Proper Watering Techniques After Transplanting
After repotting your spider plant, it’s important to start a good watering routine. Spider plants don’t like too much or too little water. Finding the right balance is crucial for their health.
Water Requirements
When you water your spider plant, make sure to soak the soil well. Water should drain from the bottom of the pot. This helps get rid of air pockets from repotting.
Don’t let the plant sit in water. This can cause root rot and other problems.
Drainage Management
Good drainage is key for your spider plant’s health. Let any extra water drain before putting the plant back. This stops waterlogging and keeps the roots moist.
Try to use filtered or distilled water. Spider plants are sensitive to chemicals in tap water.