Ever wondered how to keep your aloe vera plant happy and healthy? The answer is simple: repotting your aloe plant at the right time. As these plants grow, they need more room for their roots and to produce new pups. Repotting gives your aloe the nutrients and space it needs to thrive.
In this guide, we’ll show you how to repot your aloe vera plant. We’ll cover everything from knowing when to repot to picking the best soil and pot. Get ready to give your aloe the fresh start it needs!
Key Takeaways
- Repotting aloe vera plants is essential for their healthy growth and propagation.
- Aloe plants often produce pups, requiring regular repotting to accommodate their expansion.
- The optimal time to repot aloe vera is during the spring and summer months or early fall.
- Choosing the right pot size and soil mix is crucial for ensuring proper drainage and nutrient absorption.
- Proper aftercare, such as allowing the soil to dry out between waterings, is key to the success of a repotted aloe plant.
Introduction to Repotting Aloe Plants
Aloe vera plants are loved for their easy care and healing properties. Over time, they might need a bigger home to grow well. This is to avoid stunted leaves or a plant that’s too heavy. Repotting also lets you grow new aloe plants from the mother plant’s offsets.
Repotting your aloe vera can be a rewarding task. Knowing when and how to do it ensures your plant stays healthy. We’ll cover the key points and best practices for repotting aloe vera plants.
Aloe Vera: A Versatile Succulent
Aloe vera is a top-selling succulent worldwide, used for thousands of years. It’s also known as Aloe barbadensis, First Aid Plant, and Miracle Plant. This hardy succulent can handle temperatures as low as 28 degrees Fahrenheit.
Aloe vera grows new plants from offsets or pups at the base. While it doesn’t need regular fertilizer, a yearly top dressing with worm castings can help. This gives it a nutrient boost.
But, aloe vera can face pests like orange aphids, mealybugs, and scale insects. Proper care and repotting can prevent these problems. This keeps your aloe vera healthy and vibrant in your garden.
The Benefits of Repotting Aloe Vera
Repotting your aloe vera has many advantages:
- It gives your plant more room to grow, avoiding stunted leaves or a top-heavy plant.
- It lets you grow new aloe plants from the mother plant’s offsets.
- It refreshes the soil and adds nutrients for your plant’s health.
Understanding when and how to repot your aloe vera is key. In the next sections, we’ll explore when to repot, how to choose the right pot and soil, and the step-by-step process for repotting.
When to Repot Your Aloe Vera Plant
The best time to repot an aloe vera plant is in spring or summer. This is when the plant is most active and can adjust well to repotting.
Signs Your Aloe Needs Repotting
Here are some signs that your aloe vera plant needs a new home:
- The plant has outgrown its current pot, with roots visible through the drainage holes.
- The main plant is ready to be divided and propagated, with smaller pups emerging from the root system.
- The plant appears stunted, with wilting leaves and a top-heavy appearance, which can be a sign of being root-bound.
Repotting can solve these problems and help your aloe vera plant grow well. Fresh, nutrient-rich soil and enough room to grow are key. This way, you can avoid stunted growth or wilting leaves.

“Aloe plants tend to like a little overcrowding, indicating a preference for slightly cramped conditions before repotting.”
Aloe vera plants, being evergreen succulents, often prefer to be a bit root-bound. But, watching the plant’s size and health is crucial. This ensures it gets the care it needs to flourish.
Choosing the Right Pot for Aloe Vera
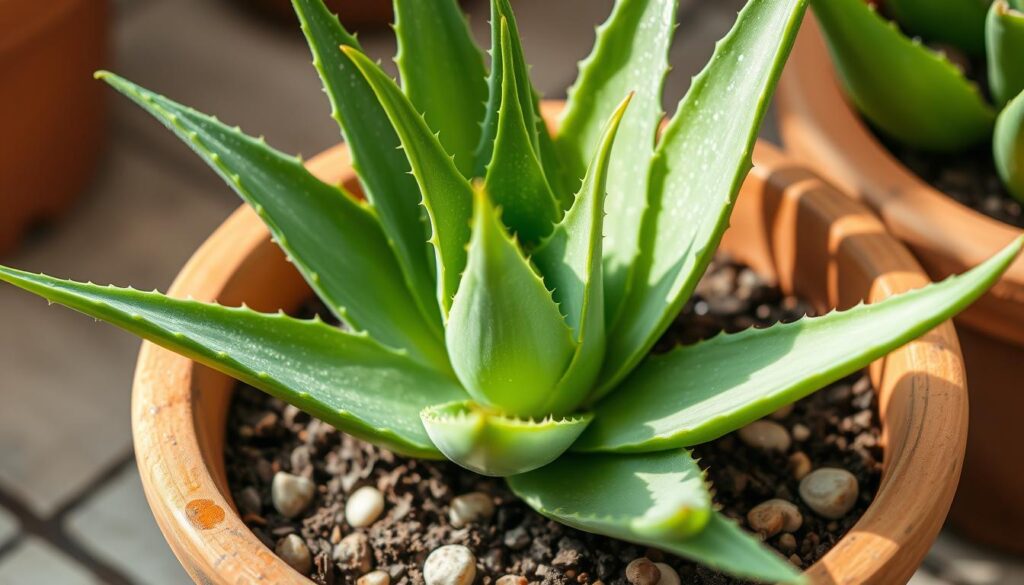
Choosing the right pot is key for your aloe’s health. Aloes do well in small, shallow pots. These pots help with drainage and airflow. Terracotta or ceramic pots are good choices. Deep pots are not recommended because aloe roots don’t grow deep.
Pot Size Guidelines
The best pot size is 5-10% wider than the current one. This gives the roots room to grow without being cramped. Make sure the pot has holes for drainage to avoid water-logging and root rot.
Pot Material Recommendations
- Terracotta pots are great for aloes because they drain well.
- Ceramic containers also work well for drainage and aeration.
- Stay away from deep plastic pots as they hold too much water.
“Succulents, such as aloe vera, are best planted in clay or terra cotta pots with proper drainage holes to prevent water accumulation.”
When you repot your aloe, pick a pot that’s just a bit bigger. This allows for growth without drowning the roots. The right pot size and material help your aloe plant stay healthy for a long time.
Selecting the Best Soil for Aloe Vera
Choosing the right soil mix is key when repotting your aloe vera plant. Aloe vera loves well-draining, nutrient-rich soil made for succulents and cacti. Regular potting soil can hold too much water, causing root rot.
Look for a mix with perlite, sand, or gravel for better drainage and air. Stay away from mixes with peat moss, coco peat, or perlite. Instead, opt for a mix like Rosy, which uses eco-friendly biochar and compost.
| Soil Mix Ingredient | Benefit for Aloe Vera Plants |
|---|---|
| Perlite | Improves drainage and aeration |
| Sand | Enhances soil structure and drainage |
| Gravel | Promotes air circulation and water flow |
| Biochar | Provides a carbon-negative, sustainable alternative |
| Plant-based compost | Adds essential nutrients for healthy growth |
Choosing the right soil mix ensures your aloe vera gets the nutrients and care it needs. Remember, soil is just one part of the equation. Consider pot size, lighting, and watering too for your plant’s health.

How to Repot an Aloe Vera Plant
Step-by-Step Guide
Repotting your aloe vera plant is easy. Start by watering it 3-5 days before to reduce shock. Get your tools ready, like a new pot, potting mix, and pruning shears.
- Gently remove the plant from its current pot, taking care not to damage the roots.
- Fill the new pot about 1/3 full with the potting mix.
- Place the aloe plant in the center of the new pot, then fill in the sides with more potting mix.
- Water the plant thoroughly and place it in a spot with indirect sunlight to allow it to adjust to its new environment.
By following these steps, you can repot your aloe vera plant successfully. Choose a pot that’s only a bit bigger than the old one. Use a potting mix that drains well to avoid root rot.
“Aloe vera is a low-maintenance and easy-to-cultivate succulent that can thrive indoors with the right care and attention.”
Repotting is key for keeping your aloe vera plant healthy and happy. With the right care and practices, your aloe vera can grow well.
Dividing and Propagating Aloe Vera Plants
When repotting an aloe vera, you can divide the plant and grow new aloe pups. Aloe plants naturally grow offsets, or pups, as they grow. The best time to separate them is late winter to early spring to avoid harming the roots.
Dividing aloe plants is quick. Carefully separate each pup from the mother plant, making sure each has roots and stem. Let the divisions dry out for 24 to 48 hours in a cool, dark place. Then, plant them in fresh potting mix in their own containers. This way, you can grow more aloe plants from one parent.
Potting and Planting Considerations
Use a mix of three parts cactus mix and one part potting soil for repotting aloe plants. Let the new plant dry out for two days before planting to prevent rot. Avoid watering until the roots have grown, usually two weeks after planting.
Wait until pups are 3–4 inches tall and have several leaves before separating them. Stem cuttings take longer to root than pups. Aloe plants start producing seeds after four years. Seeds need bright light for at least eight hours a day to germinate and sprout in two to four weeks.
| Aloe Propagation Method | Rooting Time | Recommended Conditions |
|---|---|---|
| Pup Division | 2-4 weeks | Callus for 24-48 hours, then plant in cactus mix |
| Stem Cuttings | 4-6 weeks | Callus for 24-48 hours, then plant in cactus mix |
| Seed Germination | 2-4 weeks | Require 8+ hours of bright light daily |
Aloe vera propagation takes 4 to 6 weeks to see new sprouts. With proper care and technique, you can easily divide and propagate aloe plants to expand your collection.

“Aloe plants are easy to grow and can be divided for propagation. Consider gifting extra plant babies if there is no room for them at home.”
How to Repot Aloe Vera Succulents
The process for repotting aloe vera succulents is similar to repotting other aloe plants. Choose a new pot that is slightly larger. Use a well-draining potting mix for succulents. Handle the plant carefully to avoid damaging the roots. Aloe vera succulents thrive in small, shallow containers for good drainage and airflow.
When it’s time to repot your aloe vera plant, look for signs like roots protruding from the drainage holes or the plant becoming top-heavy. The best time to transplant is during the spring, when the plant is actively growing. If the aloe is currently flowering, it’s recommended to cut the flower stalk before repotting.
- Gently remove the aloe plant from its current pot, being careful not to damage the roots.
- Inspect the roots and trim any damaged or decaying portions.
- Choose a new pot that is slightly larger than the previous one, with excellent drainage.
- Fill the bottom of the new pot with a well-draining succulent potting mix.
- Place the aloe plant in the new pot, positioning it at the same depth as before.
- Backfill around the plant with more succulent mix, tamping it down gently.
- Water the aloe thoroughly to help it settle into its new home.
After repotting, aloe vera plants need bright, indirect sunlight and well-draining soil. Allow the soil to dry out completely between waterings to prevent root rot. With proper care, your aloe vera succulent will thrive in its new pot, providing you with its unique, lush foliage for years to come.
Potting Soil Mix for Aloe Plants
Aloe vera plants need a potting mix that drains well and breathes. Rosy’s aloe vera soil is the top pick. It has perlite, sand, and compost for good drainage and nutrients.
Don’t use regular potting soil. It holds too much water and can cause root rot.
A simple mix for aloe plants is 1 part perlite or similar, 2 parts sand or grit, and 2 parts composted potting soil. This mix drains well and gives nutrients.
- Perlite expands when heated and helps with drainage and nutrient retention. It also keeps the soil pH neutral.
- Pumice has up to 70 trace elements and helps with water and nutrient retention. It also promotes drainage.
- Akadama, a volcanic rock from Japan, holds water and nutrients. It also drains well and aeration is good for aloe plants.
The best mix for aloe plants includes sand for drainage and air pockets. It also has 50% organic matter like compost for nutrients.
Getting the soil mix right is key for aloe plants’ health. Without it, they can suffer root damage and even die. So, it’s important to use the right ingredients for aloe plant care.

How to Repot an Aloe Plant
Repotting your aloe vera plant is key to keeping it healthy. Follow these steps for a successful repotting:
- Water the plant a few days in advance to reduce transplant shock. This makes the aloe more hydrated and ready for the new pot.
- Gently remove the plant from its current pot, taking care not to damage the roots. Slide the plant out carefully, supporting it to avoid breaking roots.
- Fill the new pot 1/3 full with well-draining potting mix. Use a gritty, fast-draining soil mix made for cacti and succulents.
- Center the aloe in the new pot and fill in the sides with more soil mix. Firm the soil gently around the plant to keep it in place.
- Water the plant and place it in a spot with indirect sunlight. Avoid direct sunlight until it recovers from repotting.
By following these steps, you’ll ensure a successful repotting for your aloe vera. Repot your aloe every couple of years for fresh soil and room to grow.
“Aloe vera plants can live for up to twelve years and can produce dozens of babies during their lifespan.”
With the right care, your aloe vera will thrive for years. Enjoy repotting and watching your plant grow in its new home.
Repotting Aloe Vera: Best Practices
Repotting your aloe vera plant is key to its health and growth. You need to focus on drainage and lighting.
Ensuring Proper Drainage
Choose a pot with holes to avoid waterlogging and root rot. Aloes like soil that drains well. A terracotta or ceramic pot is great for them.
Providing the Right Lighting
Aloe vera loves bright, indirect sunlight. When moving it, adjust the light slowly to prevent stress. A spot with plenty of light but not direct sun is best.
By repotting your aloe vera right, it will keep growing well. It will also keep your air clean and soothe your skin.

| Repotting Aloe Vera | Recommendations |
|---|---|
| Pot Material | Terracotta or ceramic with drainage holes |
| Soil Type | Well-draining succulent or cactus mix |
| Lighting | Bright, indirect sunlight |
| Watering | Allow soil to dry out between waterings |
| Repotting Frequency | Every 3-5 years during the active growing season |
“Properly repotting your aloe vera plant is essential to its long-term health and vibrant growth.”
Aftercare for Repotted Aloe Plants
Congratulations on successfully repotting your aloe vera plant! Now, it’s time to focus on the aftercare to ensure your aloe thrives in its new home. After repotting, let your plant rest for 5-7 days before watering as usual. This helps the roots adjust to the new soil and container, reducing transplant shock.
After the rest period, place the aloe in bright, indirect sunlight. Aloe vera plants love this light, which keeps them green and healthy. Watch your plant closely for any signs of stress or issues, like wilting or discoloration.
If you see any problems, adjust your care routine. This might mean changing how often you water, adjusting the light, or using a bigger pot if it’s too small. By watching your aloe and making changes, you can help it thrive in its new spot.
Remember, the key to successful aloe vera aftercare is patience and adaptability. With the right care, your repotted aloe will soon become a flourishing addition to your home or garden.
“Aloe vera plants are resilient, but they do require a bit of extra attention after being repotted. By following these simple aftercare tips, you can ensure your aloe continues to thrive for years to come.”
How to Repot an Aloe Plant
Repotting an aloe plant involves several key steps. These steps help ensure a successful transition. Proper repotting techniques are crucial for maintaining your aloe vera plant’s health and longevity.
- Prepare the Plant: Water the aloe plant a few days in advance. This ensures it is well-hydrated before repotting.
- Gently Remove the Plant: Carefully take the aloe plant out of its current pot. Be mindful not to damage the delicate root system.
- Fill the New Pot: Fill the new pot about one-third full with a well-draining potting mix. This mix is specifically formulated for succulents and cacti.
- Place the Plant: Position the aloe in the center of the new pot. Then, fill in the sides with more potting mix.
- Water and Position: Water the plant gently. Place it in a spot with bright, indirect light.
By following these steps carefully, you can ensure a successful repotting for your aloe vera plant. Remember to provide adequate drainage and the right soil conditions. These support the plant’s growth and health.

Repotting aloe plants is recommended during the growing season, like spring and summer. In temperate climates like Tucson, AZ, early fall is also a good time. It’s important to repot the plant when it shows signs of stress or has outgrown its current pot.
Aloe vera plants do not have deep roots. So, a shallow, wide pot is often the best choice. When selecting a new pot, ensure it has ample drainage holes. This prevents waterlogging and root rot. A well-draining potting mix, such as a succulent and cactus blend, is also essential for the plant’s well-being.
After repotting, water the aloe plant every 5 to 7 days. Allow the soil to dry out between waterings. Aloe vera plants thrive in dry conditions. They prefer their soil to be on the drier side, so be mindful not to overwater them.
Tips for Repotting Aloe Vera Successfully
To ensure your aloe vera plant thrives after being repotted, consider these valuable tips:
- Choose a pot that is 5-10% wider than the current one, with good drainage. This provides ample room for the plant to grow without becoming rootbound.
- Use a well-draining potting mix formulated specifically for succulents. This will prevent issues like soggy soil and root rot.
- Handle the plant gently during the repotting process to avoid damaging the delicate leaves and roots.
- Provide the right lighting conditions and allow the plant to adjust after repotting. Gradually introduce it to its new environment.
- Consider dividing and propagating any offsets or “pups” at the same time as repotting to promote healthy growth.
By following these best practices, you’ll give your aloe vera plant the best chance of thriving in its new home. With the right care and attention, it will continue to be a beautiful and resilient addition to your indoor garden.
Remember, patience and gentleness are key when repotting aloe vera plants. Take your time and enjoy the process of helping your plant reach its full potential.
Conclusion
Repotting your aloe vera plant is key to keeping it healthy and promoting growth. Choose the right pot and soil, and follow the steps carefully. This way, you can repot your aloe and even grow new plants from its offsets.
Don’t forget to take good care of your aloe after repotting. Make sure it gets enough water and light. With the right care, your aloe will thrive in its new home for years.
Learning how to repot aloe vera plants is a skill worth mastering. It lets you enjoy vibrant, healthy plants for a long time. By paying attention to your aloe’s needs and following best practices, you can give it a new lease on life.